
The Amazing World of Microscopes
The Amazing World of Microscopes
At the end of this lesson, you are expected to:
Master the step-by-step process of preparing a wet mount slide.
Confidently use a compound microscope to observe specimens on a wet mount slide.
Identify and explain the purpose of each step in creating a wet mount slide.
Appreciate the importance of wet mount slides in scientific observation.
Imagine you have a tiny drop of water from a pond or a leaf. What do you think is hiding inside that drop? Could there be tiny living things you can't see with just your eyes? Let's find out!
Think about a time you looked at something really, really small, like a tiny ant or a grain of sand. Now, imagine looking at something even smaller – so small you can't see it at all! That's where our special tool, the microscope, comes in. Today, we're going to learn how to prepare a "wet mount slide." This is like making a tiny window so we can peek into the secret world of the very small.
Welcome, young scientists! Today, we embark on a fascinating journey into the microscopic world. Our mission is to learn how to prepare a wet mount slide. This is a fundamental skill for any budding biologist, allowing us to observe tiny specimens that are invisible to our naked eyes. Think of it as creating a special sandwich for our tiny friends so they can be viewed clearly under the compound microscope.
What is a Wet Mount Slide?
A wet mount slide is a simple way to prepare a specimen for viewing under a microscope. It involves placing a drop of liquid (usually water) containing the specimen on a glass slide, covering it with a thin piece of glass called a coverslip, and then observing it. This method is perfect for viewing living organisms like bacteria, algae, or even parts of plants and animals that are best observed in a liquid environment.
Why is it Important?
The compound microscope is our powerful tool for seeing the unseen. However, to see things clearly, we need to prepare our specimens properly. A wet mount slide helps to:
Keep the specimen moist: Many microscopic organisms are aquatic or live in moist environments. The water in the wet mount keeps them alive and in their natural state for observation.
Hold the specimen in place: The liquid and coverslip prevent the specimen from moving around too much, making it easier to focus and observe.
Allow light to pass through: Glass slides and coverslips are transparent, allowing light from the microscope's illuminator to pass through the specimen, making it visible.
Materials You Will Need:
Before we begin, let's gather our essential tools. It's like preparing your ingredients before cooking!
Glass Slides: These are thin, flat pieces of glass, usually about the size of your thumb. They are the base for our specimen.
Coverslips: These are very thin, square or circular pieces of glass. They are placed over the specimen and liquid on the slide. Be careful, they are fragile!
Dropper or Pipette: This is used to carefully transfer a small drop of liquid containing the specimen onto the slide.
Specimen: This could be pond water, a piece of an onion skin, a leaf scraping, or even a drop of your own saliva (don't worry, it's safe!).
Water: A small amount of clean water, often in a small beaker or bottle.
Paper Towels or Lens Paper: For cleaning up any spills and for gently wiping the microscope lenses.
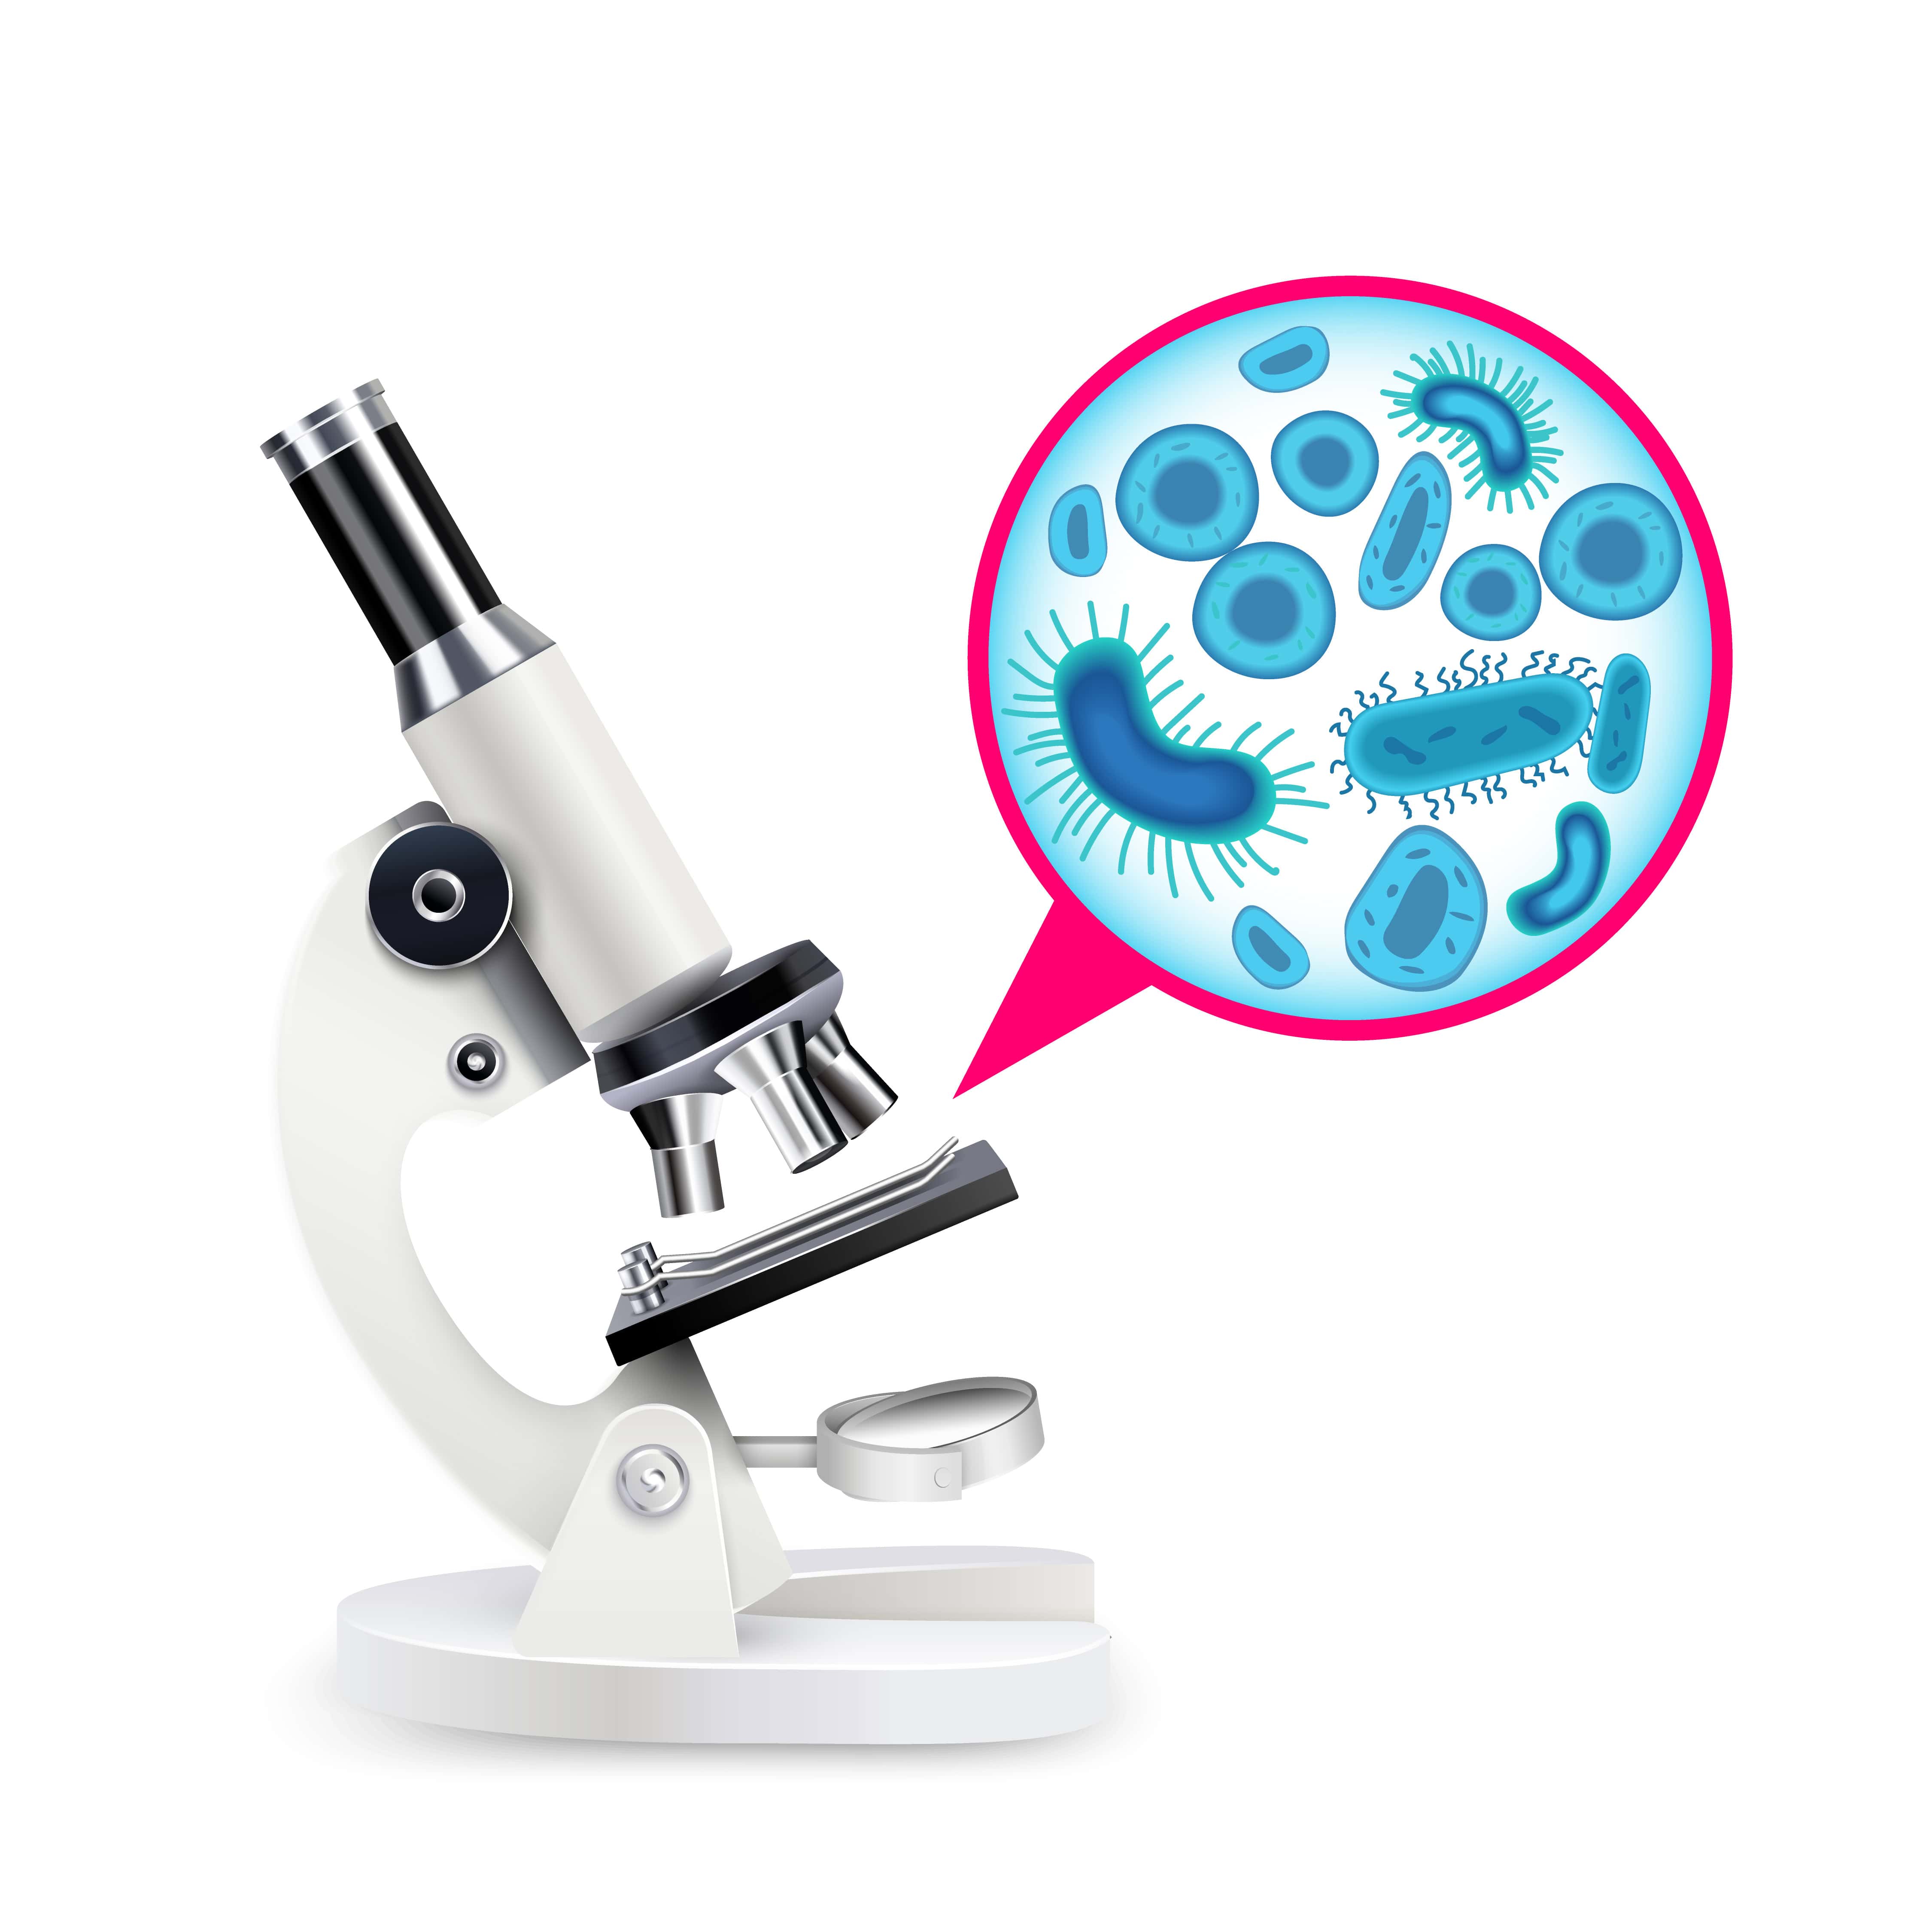
Compound Microscope: Our amazing tool for viewing the microscopic world!
Step-by-Step Guide to Preparing a Wet Mount Slide:
Let's get started! Follow these steps carefully. Remember, patience and precision are key in science!
Step 1: Clean Your Workspace and Materials
Make sure your table is clean and dry.
Gently wipe the glass slide and coverslip with lens paper or a soft, lint-free cloth. This removes any dust or smudges that could interfere with your view. Imagine cleaning the windows of a house so you can see the view outside clearly.
Step 2: Add a Drop of Liquid
Using your dropper or pipette, carefully place one small drop of your specimen liquid (like pond water) in the center of the clean glass slide.
Tip: Don't use too much liquid! A single, small drop is usually enough. If you use too much, the coverslip might float, and the specimen might get washed away. Think of it as adding just enough water to make a small puddle, not a lake!
Step 3: Place the Specimen (If Necessary)
If your specimen is something solid, like a piece of onion skin or a leaf, you might need to place it in the drop of water.
Use tweezers or a needle to gently place the specimen into the drop of water on the slide. Try to spread it out a bit so it doesn't clump together.
Step 4: Add the Coverslip – The Gentle Way!
This is a crucial step, and doing it correctly prevents air bubbles from forming, which can obstruct your view.
Hold the coverslip at a 45-degree angle to the slide.
Position one edge of the coverslip so it touches the edge of the water drop.
Slowly and gently lower the coverslip onto the drop. Let the liquid spread out evenly under the coverslip.
Why this angle? This technique allows the water to spread gradually under the coverslip, pushing out most of the air and preventing those annoying bubbles. Imagine gently laying a blanket over something – you want it to cover smoothly, not bunch up!
Step 5: Check for Air Bubbles
Look at your slide. Do you see any large, dark circles or irregular shapes? Those are likely air bubbles.
If you have too many air bubbles, you can try gently tapping the coverslip with the eraser end of a pencil. Sometimes, this helps them move to the edge. If there are still too many, you might need to carefully lift the coverslip and try again.
Step 6: Blot Excess Water
If there's any liquid (water) that has spilled over the edges of the coverslip, use a small piece of paper towel or lens paper to gently blot it away. Be careful not to press too hard, or you might suck the liquid out from under the coverslip.
Step 7: Observe Under the Microscope!
Now for the exciting part!
Place your prepared wet mount slide on the stage of the compound microscope.
Secure it with the stage clips.
Start with the lowest power objective lens (usually the shortest one).
Look through the eyepiece and slowly turn the coarse adjustment knob until you can see something.
Use the fine adjustment knob to sharpen the image.
If you need a closer look, carefully switch to a higher power objective lens and readjust the focus using only the fine adjustment knob.
Example 1: Observing Pond Water
Imagine you collected a sample of pond water. You prepare a wet mount slide as described above. When you look through the microscope, you might see:
Tiny swimming creatures: These could be paramecia, amoebas, or rotifers. They move around in the water, and you can observe their shapes and how they propel themselves.
Algae: These are tiny green plants that float in the water. You might see long strands or single-celled algae.
Debris: Small particles of leaves, sand, or other organic matter.
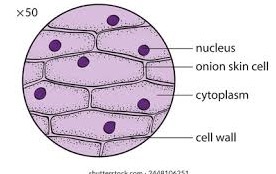
Example 2: Observing an Onion Skin
Onions are plants, and their layers are made of cells.
Carefully peel off a very thin, transparent layer from the inside of an onion bulb. This is the epidermis.
Place this thin layer in a drop of water on your slide.
Add the coverslip.
When you observe this under the microscope, you'll see rows of rectangular or brick-like plant cells. You should be able to clearly see the cell wall, the cytoplasm, and a darker spot within the cytoplasm, which is the nucleus. You might even see small, green dots if it's from a green part of the onion – those are chloroplasts!
Tips for Success:
Less is more: Use only a small drop of water.
Gentle handling: Be very careful when placing the coverslip to avoid air bubbles.
Start low: Always begin observation with the lowest power objective lens.
Cleanliness: Keep your slides and coverslips clean.
Patience: Sometimes it takes a few tries to get a perfect wet mount. Don't get discouraged!
By mastering the wet mount technique, you've unlocked the door to exploring the incredible diversity of life at the cellular level. You are now ready to use your microscope effectively to discover the hidden wonders around you!
Guided Practice: "My First Microscopic View"
Let's practice together! Imagine you have a slide with a drop of water and a piece of elodea (a common water plant) leaf.
Prepare the slide: You've already got the specimen in the water. Now, carefully place the coverslip at a 45-degree angle and let it drop gently.
Focusing: Place the slide on the microscope stage. Start with the lowest power objective. Look through the eyepiece.
Finding the specimen: Slowly turn the coarse adjustment knob. What do you see? Is it blurry?
Sharpening the image: Use the fine adjustment knob to make the image clear. Can you see the outlines of the plant cells?
Identifying parts: Look closely. Can you see the cell wall? The green blobs inside are chloroplasts! Try to count how many you can see in one cell.
Moving the slide: Gently move the slide left, right, forward, and backward. How does the image move in the eyepiece? (Hint: It moves in the opposite direction!)
Interactive Activity: "Bubble Trouble!"
Let's see how air bubbles behave.
Prepare a wet mount slide with just a drop of water.
Intentionally place the coverslip straight down, trapping a lot of air. You should see many large, dark circles (air bubbles).
Now, try to get rid of them. Gently tap the coverslip with your pencil eraser. Do some bubbles disappear or move?
Try preparing another slide, this time using the 45-degree angle method. Compare the number of air bubbles in both slides. Which method is better? Why?
Independent Practice: "The Mystery Specimen"
Your teacher has prepared several wet mount slides with different common specimens (e.g., cheek cells, yeast, mold, or different types of algae).
Choose one slide.
Prepare it properly if it's not already done (or re-prepare it if you want more practice).
Observe it under the microscope, starting with low power and moving to higher power if needed.
Draw what you see in your science notebook. Label the parts you can identify. Write down any observations about how the specimen moves or what it looks like.
Have you ever wondered how doctors diagnose illnesses? Many diagnostic tests involve looking at samples from the human body under a microscope. For example:
Blood tests: Doctors can examine blood cells (red blood cells, white blood cells) on a wet mount slide to check for infections, anemia, or other conditions.
Urine tests: Looking at urine under a microscope can help detect bacteria, crystals, or other abnormalities that might indicate a health problem.
Tissue samples: When a biopsy is performed, a small piece of tissue is taken and prepared as a slide to examine cells for diseases like cancer.
The ability to prepare a wet mount slide and observe specimens is a fundamental skill used by scientists and medical professionals every day to understand health and disease!
Today, I learned that a wet mount slide is a special way to prepare tiny things so we can see them using a microscope. I discovered that I need a glass slide, a coverslip, a dropper, and some water. The most important steps are putting just one small drop of liquid in the center of the slide and carefully lowering the coverslip at a 45-degree angle to avoid air bubbles. By doing this, I can observe amazing things like tiny creatures in pond water or the cells that make up plants. This skill is super important for scientists and doctors!
I can now prepare a wet mount slide to observe different specimens.
I can use a compound microscope correctly, starting with low power and using the adjustment knobs to focus.
I can identify basic cell structures like the cell wall and chloroplasts in plant cells.
I can explain to a friend or family member how to make a wet mount slide.
I can look for opportunities to use a microscope at home or in a science club to explore more.
No Comments Yet